::NAV BAR::

home explore eat decorate create
Showing posts with label Eat. Show all posts

Tuesday, October 8, 2013

How to make Thai Green Curry

I have to say that I absolutely LOVE ethnic food- especially Indian and Thai! I've been trying to cut down on my expenses (look out for my Coupon post coming soon!) and thought that I would try my hand at one of our favorite meals- Thai Green Curry. This required a trip to the Asian market that was luckily not too far from our house (I went to the Oriental Market on Central Ave). I have to admit, I was a bit nervous about going there (would I even understand what things were??), but it was a great experience and I can't wait to go back! I will also never buy sriracha or chili paste from my local grocer ever again- they were so much cheaper at the Oriental Market! There was an assortment of goodies there- Indian curry powders, dried chiles, Thai curry pastes, quail eggs, fish, green tea ice cream....I walked up and down the aisles taking in everything, and can't wait to go back. So without further ado, here is the recipe to my Thai Green Curry- which my husband said was better than almost every restaurant he's ever been to!


Thai Green Curry (makes 8 servings)

2 cans coconut milk (when you open it you'll notice there is some cream at the top, scoop that out so you only use the milk. It's okay if a little cream gets in the curry, don't worry.)

2 stalks lemon grass, cut into 4" pieces and smashed (see below)

4-6 tbsp. green Thai curry paste

2 tbsp. fish sauce

1 can bamboo shoots (I like the shoestring ones)

2 Kashir leaves (These are essentially a type of lime leaf and give the recipe an extra zing. It's a staple in true Thai curry recipes. Freeze the rest of the leaves in a ziplock bag for future recipes.)

2 lbs cubed chicken breast or thigh, whatever your preference

1 tbsp salt

Jasmine rice (cook to directions)

Optional: Vegetables of your choice- eggplant, peas, carrots, etc. I chose peas.
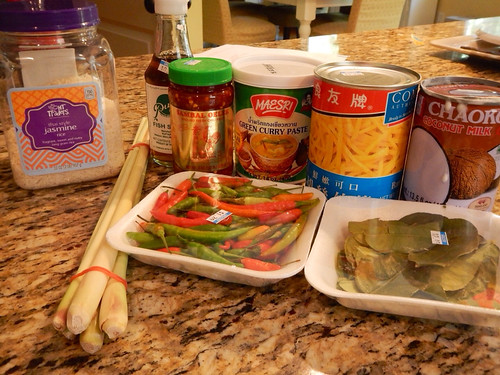
Note- I didn't use those chiles, the curry paste was hot enough!

Recipe:

Ok, first of all, let me say that the amount of curry paste that you use will determine how spicy your green curry is. If you like your food medium with a bit of heat I would use 3-4 tbsps, but if you're like me and you like things Thai hot you should use 6-7 tbsps. Note**You can always add more curry paste, start with less and work up throughout the recipe!

To cut and smash the lemon grass you are going to take the stalk and cut the bottom 1-2' off and then anything leafy at the top. These parts are very tough, which is why we're cutting them off. My lemon grass already had the top cut off so I only had to cut the bottom.

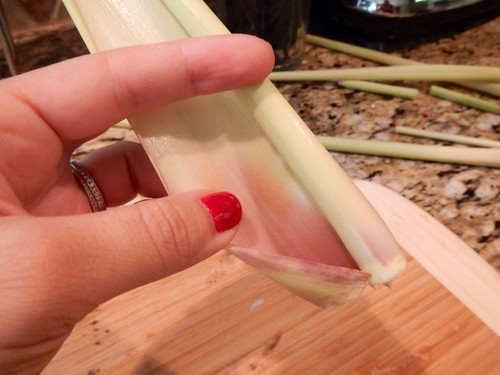
Now you are just going to unroll the top 2 layers of the lemon grass stalk. It should come off very easily, revealing a fresh, meaty layer underneath:
All of the juices and oils are inside this nice meaty part of the stalk, which is why we are going to smash it. I don't own a meat tenderizer, so I used the bottom of my ice cream scoop. Just smash away and cut into 4" pieces:

Now you're ready to get cooking! In a large pot add the lemon grass, coconut milk, green curry paste, salt, 2 whole kashir leaves, and fish sauce. Stir to combine everything and simmer for a few minutes until you smell that nice curry aroma.

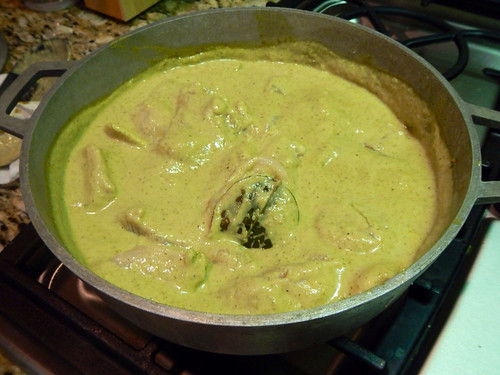
Then, add your cubed chicken to the pot. Let this gently simmer for 30-45 minutes, or until the chicken is tender.
By adding extra curry paste or kashir leaves you can adjust the seasonings and flavorings if needed. I found that one kashir leaf per can of coconut milk was enough for me, but you may want more- taste the curry towards the end to see what you think. If you think it's too spicy or thick you can add water to it (remember to add slowly!).
Once the chicken is tender just add your veggies and bamboo shoots. I steamed a bag of peas since they were frozen and added about 3/4 of the bag and about 3/4 of the can of bamboo shoots. Next time I'm adding eggplant!

Before serving take out the kashir leaves and lemon grass stalks. Or just tell your guests to refrain from eating them. Serve over a bed of rice and enjoy!!


Sunday, March 10, 2013

Juicing...

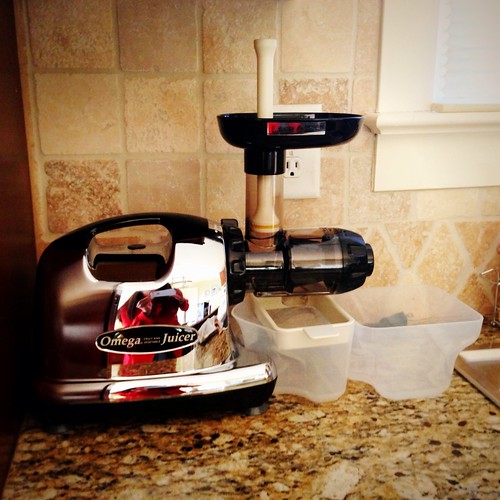
One of my very favorite things after working out is fresh green juice. The Common Market near my house makes fresh juice daily, and the Supreme Green is my "treat" to myself. I'm not great about eating leafy greens, so I started to think more about juicing and incorporating it into my getting healthy plan new lifestyle. So, after a few weeks of research (wow, had no idea there were so many opinions on types of juicers!) I took the plunge and bought one last week! I decided on the Omega 8006 for two main reasons- one, it's a masticating juicer which supposedly is better for leafy greens, and two, it's not just a juicer- oh no, this baby makes sorbet, nut butter, almond milk, and salsa! Here it is:
Couldn't figure out a way to not be in the photo!
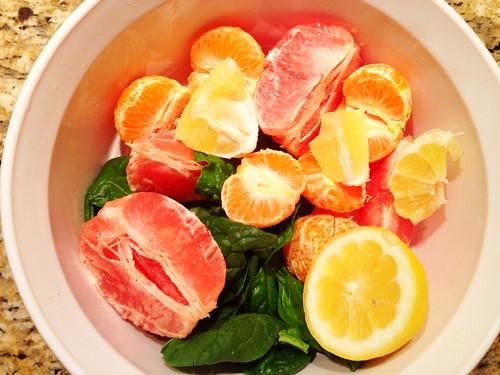
Of course the minute I got it I had to hurriedly unwrap it like a kid on Christmas and put it to use. Never mind that my fridge wasn't really stocked, I was going to juice something! Luckily, I did have a grapefruit, a few clementines, spinach, and a lemon....
Get Up & Go Juice (great for the morning)
1 grapefruit, peeled
4 clementines, peeled
1/2 lemon, peeled
1 handful fresh spinach
Into my juicer they went...and I was pleasantly surprised by how easy it was to use the juicer. It's also very quiet which is a big plus- Bob likes to make protein smoothies in the morning and I swear our blender must wake the neighbors.
In action...go juicer go!
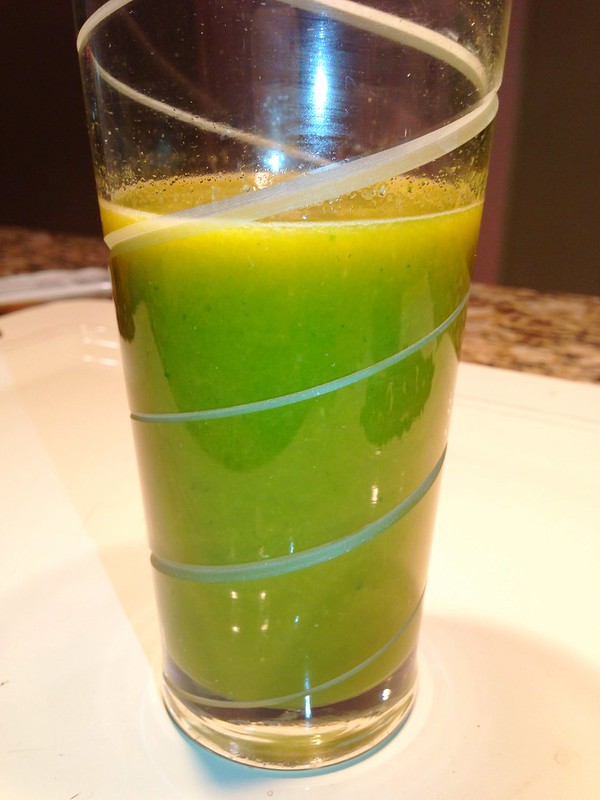
When I finished I had a nice big glass of citrus-y juice. The spinach was completely masked. It was a little tart, so I added just a smidge of pineapple juice to it. Overall, a success!
Way tastier than it looks!
I decided to freeze the pulp for sorbet- I'll let you know how that turns out in another post!

Sunday, February 24, 2013

Poached Eggs Made Easy...

If there is one thing that I absolutely love for Sunday brunch, it's Eggs Florentine- similar to Eggs Benedict, sans the ham, with tomato and spinach instead.  I went to bed feeling ambitious last night and decided to try making poached eggs myself.  I was a bit nervous, especially when I learned I only had two eggs left so didn't have enough for a "do-over" if I needed it (and my hungry hubby was patiently waiting with a fork in his hand), but it was much easier than I anticipated!  One thing I learned- don't cook over a gas stove while wearing an oversized terry robe...the arm just may catch fire.  So my tally of fires started in the kitchen is now 5, but don't worry, after a crazy fire dance in the kitchen to put it out I wasn't burned, and my robe will live.  Ready to poach an egg?  Here's how I did it:

Bring about 4" of water to a simmer.  You want that barely-there simmer that comes right before a boil, but you don't want it actually start boiling.  Once it gets there turn the temperature down.  I have a gas stove and even on low it tries to start boiling, so I took the pot off the burner before adding the egg, and then put it back on the burner.

While the water is getting hot add  a splash of vinegar.  This helps the egg whites set.


One of the biggest mistakes in poaching an egg is cracking the egg directly into the water.  Instead, crack the egg in a small bowl or ramekin and then pour the egg right at water level.

  
Your egg will try to spread out all willy nilly, don't worry!  Just take a spatula and push the egg whites together.  After at least 30 seconds run your spatula around the whole egg to make sure it's not stuck anywhere.  I like to nudge mine to move it just a bit.

Pretty egg in progress!  Cook for 3-4 minutes, not a second more.  I didn't take pictures when I pulled it out, I just didn't have the hands- sorry!  Just take a slotted spoon and gently scoop out the egg, then place it on a paper towel to let it drain.


Place on a piece of buttered toast and voila!

Perfectly poached eggs!

I prefer mine with spinach and tomatoes.  So good, and good for you!


Thursday, February 21, 2013

Healthy Breakfast Egg Cups

When 2013 rolled around I decided it was time to kick it into gear and get healthy!  In the past I've been bad about letting life get in the way of eating healthy and last year was no exception- with Bob practically living in Charlotte before we moved,  packing up and selling our house, moving to Charlotte, and me starting a new job (all within 3 months!).  Now that we are finally feeling settled I've decided to focus on me for a change.  I think as women, we have a tendency to put everyone else's needs ahead of ours...it's the nurturer in us.  The two things I'm focusing on right now as Part 1 of Jamie's New Healthy Lifestyle are eating healthy and portion control.  I've realized that if I don't eat breakfast I can and will eat anything in sight at lunch (don't get in my way!) so I've started making these yummy egg cups on Sundays so I can grab-n-go throughout the week.  They're easy, satisfying, and the best part is that you can tailor them to the veggies you like to eat.  Don't like tomatoes?  Add your chopped veggie of choice!

Healthy Breakfast Egg Cups
6 Eggs
Handful of fresh spinach (thicker stems taken off)
1/3 cup milk
12 cherry tomatoes, quartered
1 cup shredded cheese of choice (I used fat free mozzarella)
salt & pepper to taste

Directions:
Preheat oven to 400 degrees.  I lined my muffin tins for easier cleanup, but if you're storing these to eat throughout the week I would just spray the tins with cooking spray- the liners didn't hold up too well.

Place a small amount of spinach in the bottom of each muffin tin
Divide the cheese and tomatoes between the cups, so that they are 2/3 full
Crack an egg into each one, then add a teaspoon or so of milk and a dash of salt and pepper.
Stir just a little.
Pop in the oven for 14 minutes, or until egg has set.
Enjoy immediately or refrigerate to eat throughout the week!

These egg cups are right around 100 calories.  Feeling adventurous?  Add salsa, avocado, red peppers...even cooked turkey bacon or sausage!  The possibilities are endless!


Tuesday, July 31, 2012

Girls Night In, Easy Appetizers - Tomato, Mozzarella, and Basil, Two Ways!

Why is it that on the days you have something planned, the time always gets away from you? I'll have a girls night planned and will look up at the clock to find that it's 6pm and I'm going to be LATE! But of course, on the days where you have nothing planned that never happens! Whenever this happens I pull a recipe from my arsenal of easy apps so that I'm not rushing too much, and can get there and enjoy myself.


One of my favorite easy appetizers is skewered tomato, mozzarella, and basil. It's low calorie and carb-friendly for your girlfriends that are picky, and it looks gorgeous! Here are two ways to make them:

Recipe #1:

Tomato, Mozzarella, and Basil Skewers (total time, 10 minutes, feeds 4-6)

What you'll need:

1 package of cherry tomatoes

1 package of small mozzarella balls (can usually be found in the deli section with the fresh cheeses)

Balsamic glaze

Fresh basil

Skewers (10-15 wooden or plastic, there are eco- friendly ones that you can reuse as well)

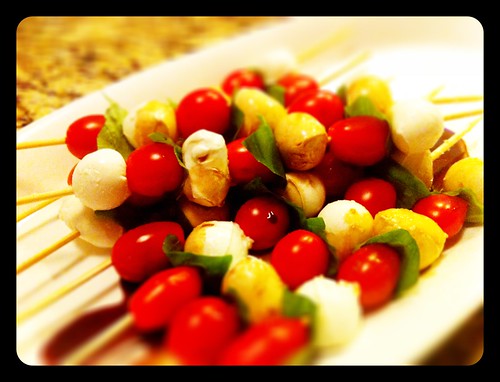
The steps are so easy! After washing the tomatoes, start skewering them, and follow with a mozzarella ball and a piece of basil. Once you have finished making the skewers arrange them on a platter and drizzle with balsamic glaze. You can also season with salt and pepper if you like. Pair with a bottle of wine and you're all set- now you have time to finish your makeup!

I used balamic vinegar for these, the glaze is prettier!
Recipe #2:

Mozzarella and Basil filled Tomato Cups (total time, about 30 minutes, feeds 6-8)

What you'll need:

1 package of cherry tomatoes

String cheese (4-6 should be enough)

Balsamic glaze

Fresh basil

This version is a bit more time consuming, but looks amazing when put together! First, cut the top off the cherry tomotoes and cut just a tiny bit off the bottom to make the bottom flat so it doesn't fall over. Then scoop out the inside of the tomato to hollow it out. Put a piece of basil inside of the tomato cup so it sticks out almost like it's a leaf. Then, cut the string cheese width-wise to fit (about 1/4" should work). If the tomato cup is too small insert the mozzarella piece on it's side. After you've finished all of them, arrange on a platter and drizzle with balsamic glaze! Here's a photo of the finished tomato cups:

Substitute goat cheese for mozzarella if you want to change these up a bit!


Related Posts Plugin for WordPress, Blogger...